

Ice is one of the most common substances in households throughout America, and its availability and usefulness make it a treasured resource. These same qualities make ice a go-to choice for fun, interesting and educational science projects that capture the imagination without producing any significant costs. Let’s take a look at four projects that illustrate the value of ice in scientific demonstrations.
1) Testing the Effects of Rising Sea Levels
As temperatures rise across the globe, rising sea levels are now an active concern for many countries. You can examine the impact of rising seas with this simple experiment. First, fill roughly one-third of a small, clear plastic container with cold tap water. Next, drop three cubes of ice into the container and quickly mark the level of the water with a marker. At room temperature, the ice will gradually melt. When it’s gone, re-check the water level. You’ll notice a clear increase.
This experiment mimics the effects of melting ice at the planet’s North Pole, an area that has no underlying land mass. With a little modification, you can also mimic the effects of melting at the South Pole, which does have an underlying land mass. Begin by placing modeling clay or Play-Doh in the bottom of a clear plastic container and adding cold tap water. Next, press three ice cubes into the clay/Play-Doh surface and mark the water level. Measure as before when the ice melts.
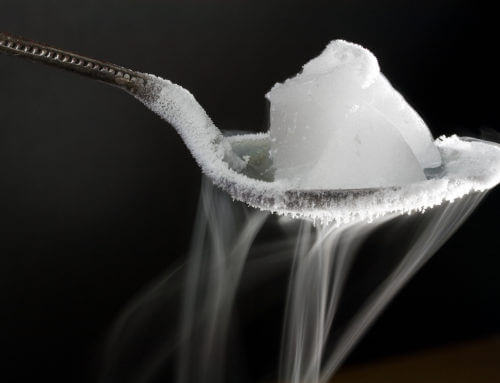
2) Changing the Melting Rate of Ice
Ice doesn’t always melt at a uniform temperature. In fact, a number of factors can increase or decrease its normal melting rate. Use the following simple project to demonstrate this fact. First, set out four identical drinking glasses on an indoor surface not in direct sunlight. Next, add an ice cube to each glass, making sure that each cube is the same size. In one glass, sprinkle a quarter teaspoon of salt over the ice. In the next glass, sprinkle an equal amount of sugar. In the third glass, sprinkle an equal amount of sand. Don’t add anything to the fourth glass.
For the next 30 minutes or so, periodically check and compare the rate of melting in each of the four glasses. When time is up, make your final observations and see which glass has the most ice left. Ask yourself why each cube of ice in the first three glasses melted slower or faster than the cube in the fourth glass.
3) Lifting Ice Without Touching It
It may seem physically impossible, but you can lift ice from a glass without touching it with your hands or pulling it out with a spoon or other utensil. All it takes is an understanding of how salt temporarily lowers the freezing point of water. You can demonstrate this fact with a simple experiment.
First, place a single cube of ice into a glass of cool water. Next, take a piece of string and dangle it into the glass so that its lower end touches the surface of the ice cube. Once you make this connection, pour a small amount of salt onto the point where the ice and string meet. Dangle the other end of the string over the edge of the glass and wait for a few minutes, then gently lift it up into the air. The lower end of the string should stick to the ice and allow you to pull the cube out of the glass. Why? In the presence of the salt, the ice begins to melt. However, at a certain point, the melting stops and the temperature on the surface of the ice lowers again and stabilizes. The string essentially becomes embedded in a thin layer of ice and acts like the chain on an anchor.
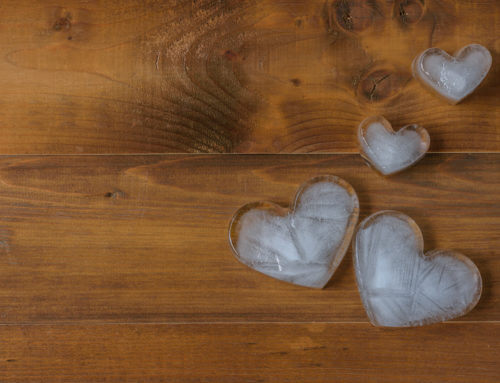
4) Simulating Ice Growth
In outdoor environments, ice usually grows in thickness when water below a certain temperature makes contact with an existing icy surface. You can simulate this effect with a simple, visually fascinating indoor experiment. Begin by laying an unopened bottle of water on its side in your freezer. After roughly two hours and 45 minutes, gently remove the bottle. If everything goes well, you’ll still have a bottle filled with water, not ice (demonstrating a physical principle called “supercooling”).
Without disturbing the bottle of supercooled water in any way (e.g., bumping, knocking or shaking), open it and pour its contents slowly and gradually over a tub or container of ice placed on a counter or tabletop. (To avoid any unwanted accidents, make sure the tub/container has plenty of space for overflow.) When the water makes contact with the ice, it will create additional ice growth that you can control by changing the position of the bottle. With enough room, ice and supercooled water, you can form mountains, towers or other structures right before your eyes.
Leave A Comment